Nissan Murano: Heater & Air Conditioning System :: Removal and Installation / Condenser
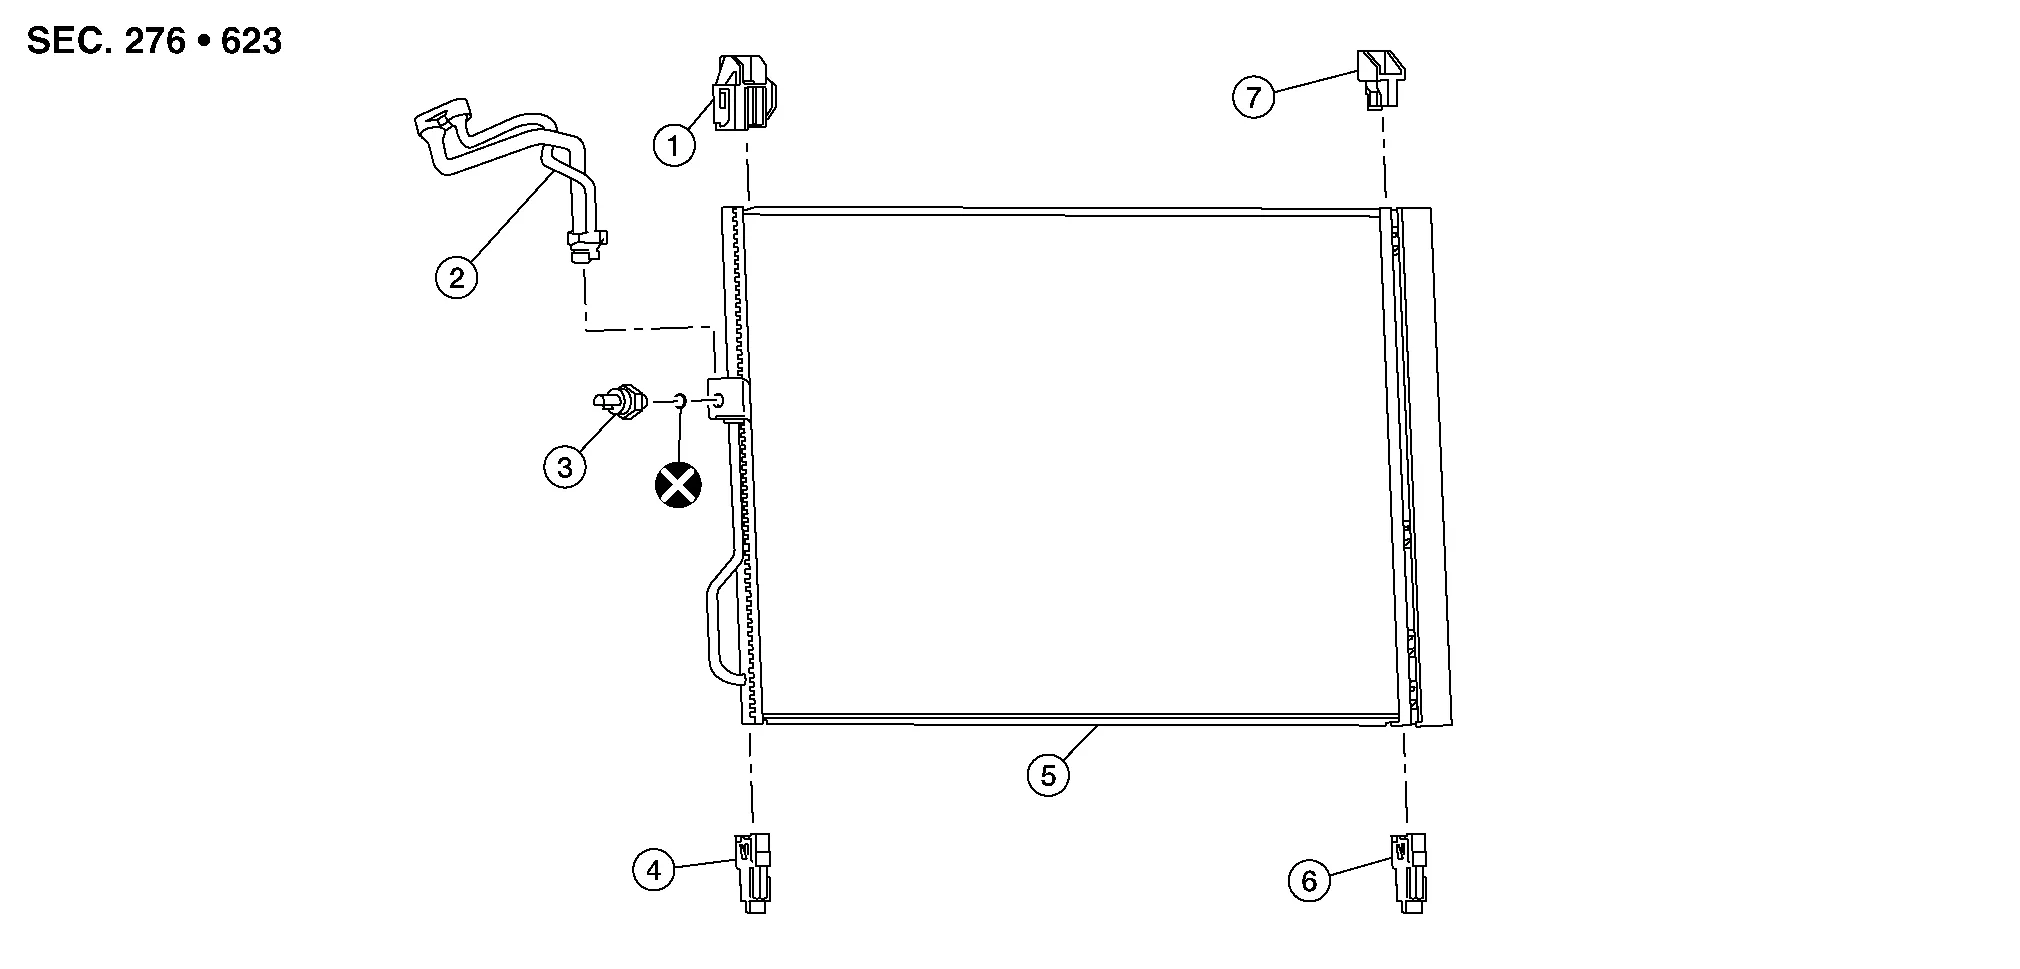
| 1. | Condenser upper bracket (RH) | 2. | Condenser pipe assembly | 3. | Refrigerant pressure sensor |
| 4. | Condenser lower bracket (RH) | 5. | Condenser (includes liquid tank) | 6. | Condenser lower bracket (LH) |
| 7. | Condenser upper bracket (LH) |
REMOVAL
Discharge the refrigerant. Refer to Recycle Refrigerant.
Remove the front air duct. Refer to Exploded View.
Remove the hood lock assembly. Refer to Removal and Installation.
Disconnect the harness connector from the refrigerant pressure sensor.
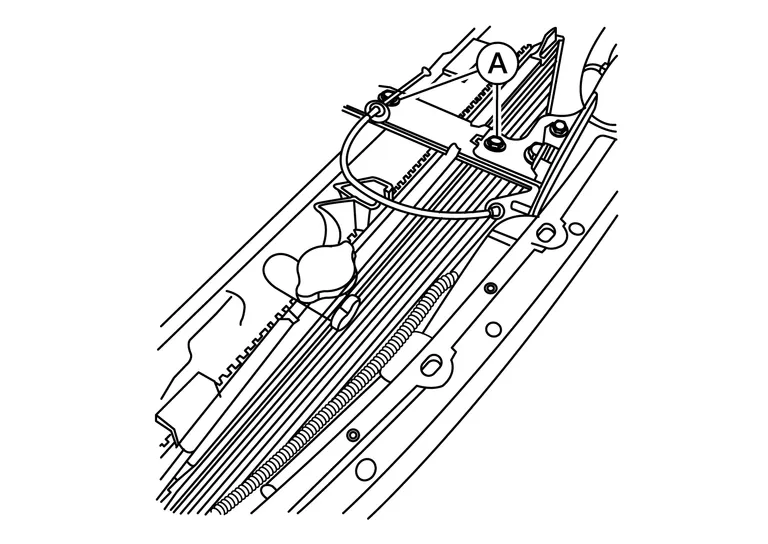
Remove the radiator core support center brace bolts (A) then remove the radiator core support center brace.
Remove the bolt that retains the condenser pipe assembly to the condenser then separate the condenser pipe assembly from the condenser.
CAUTION:
Cap or wrap the joint of the pipe with suitable material such as vinyl tape to avoid the entry of air.
Remove the condenser bracket bolts.
Remove the condenser.
Remove the refrigerant pressure sensor (if necessary). Refer to Removal and Installation.
INSTALLATION
Installation is in the reverse order of removal.
CAUTION:
-
Do not reuse O-rings.
-
Apply A/C oil to the O-rings of the condenser for installation.
-
After charging the refrigerant, check for leaks. Refer to Leak test.
 Internal Heat Exchanger
Removal and Installation
REMOVALDischarge the refrigerant. Refer to Recycle Refrigerant.
Remove the engine room cover. Refer to Removal and Installation...
 Condenser Pipe Assembly
Removal and Installation
REMOVALDischarge the refrigerant. Refer to Recycle Refrigerant.
Remove the core support cover. Refer to Exploded View.
Remove the front grille...
Other information:
Nissan Murano (Z52) 2015-2024 Service Manual: C1b56-97 Sonar Circuit
DTC Description DTC DETECTION LOGIC DTC No. (On board display) CONSULT screen items (Trouble diagnosis content) DTC detection condition C1B56-97 SONAR CIRCUIT (Sonar circuit) Diagnosis condition When engine is running Signal (terminal) — Threshold ADAS control unit detects that rear sonar control unit circuit has a malfunction...
Nissan Murano (Z52) 2015-2024 Service Manual: B132a External Usb
DTC Description DTC DETECTION LOGIC DTC No. CONSULT screen terms (Trouble diagnosis content) DTC detection condition B132A–13 External USB (USB) [OPEN] Diagnosis condition When ignition switch is ON. Signal (terminal) — Threshold – Diagnosis delay time 30 seconds or more B132A–01 [–] Diagnosis condition When ignition switch is ON...
Categories
- Manuals Home
- Nissan Murano Owners Manual
- Nissan Murano Service Manual
- Settings
- Power Steering Fluid (PSF)
- Rear bench seat adjustment
- New on site
- Most important about car
Front manual seat adjustment (if so equipped)
Your vehicle seats can be adjusted manually. For additional information about adjusting the seats, refer to the steps outlined in this section.
Forward and backward
